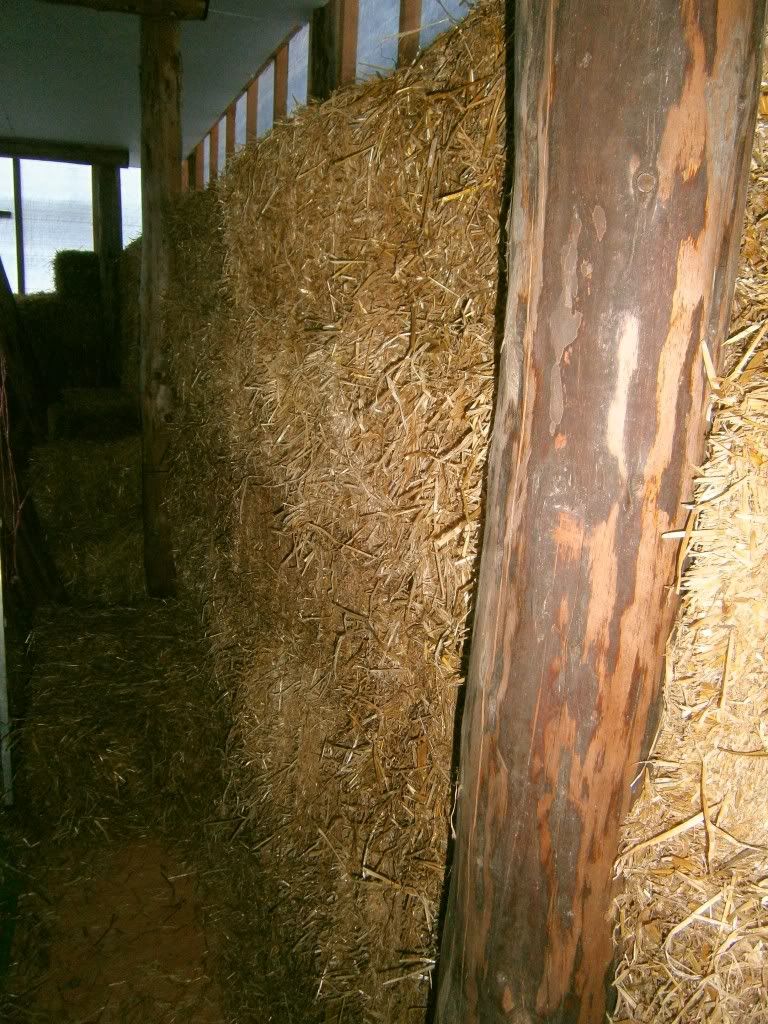
Thought I might just post this as an update....
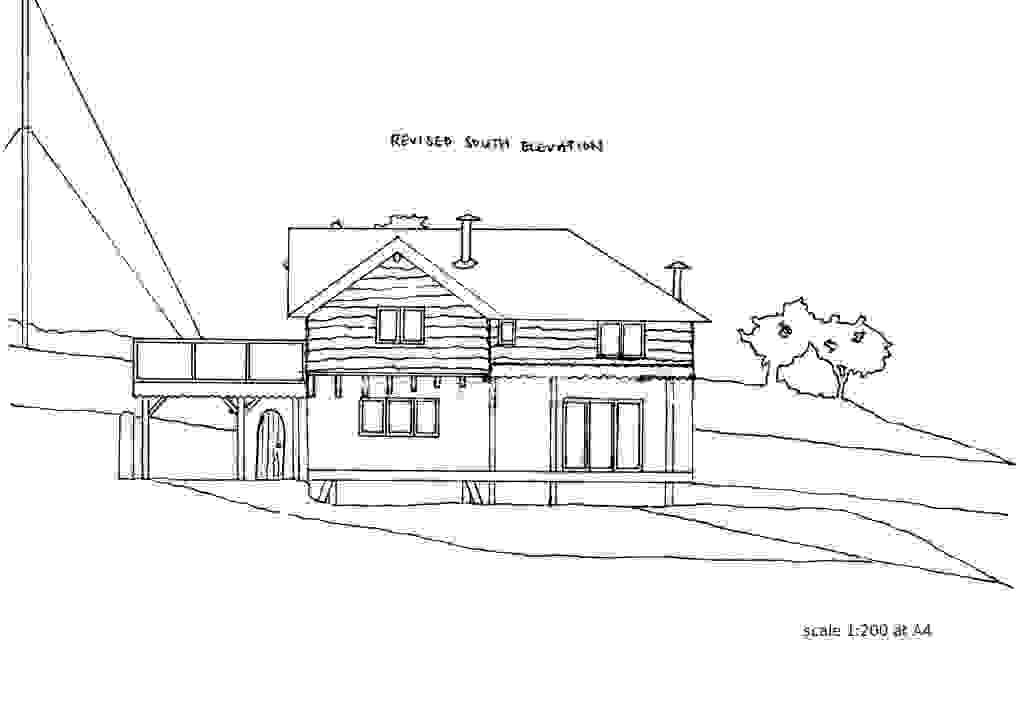
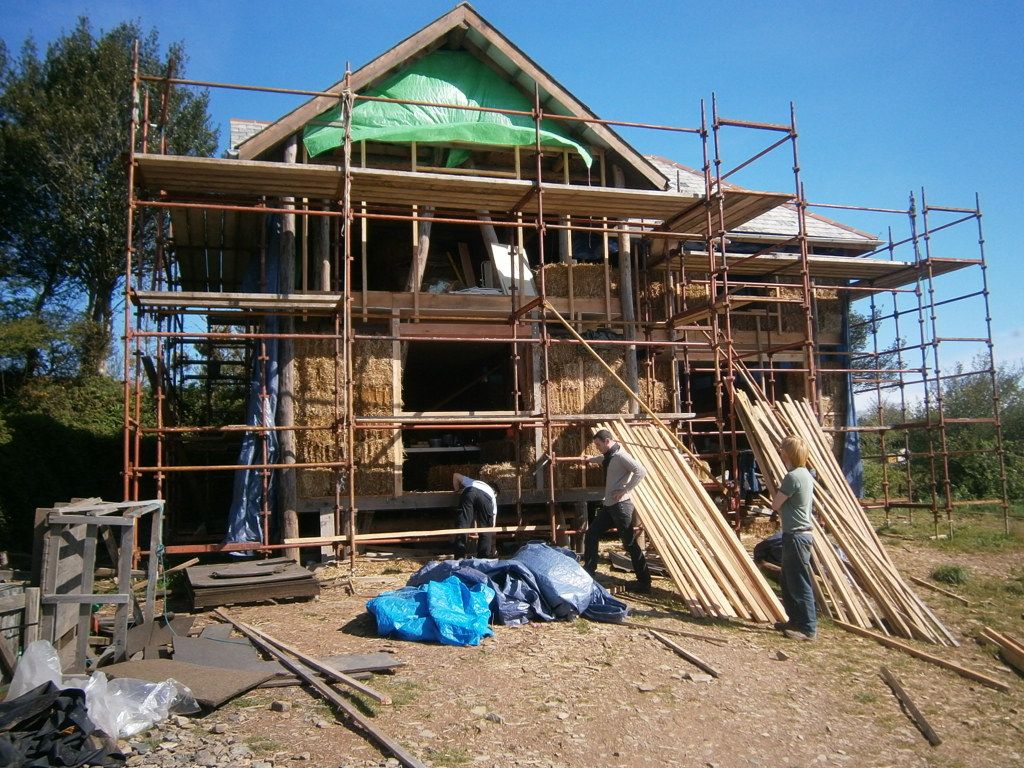
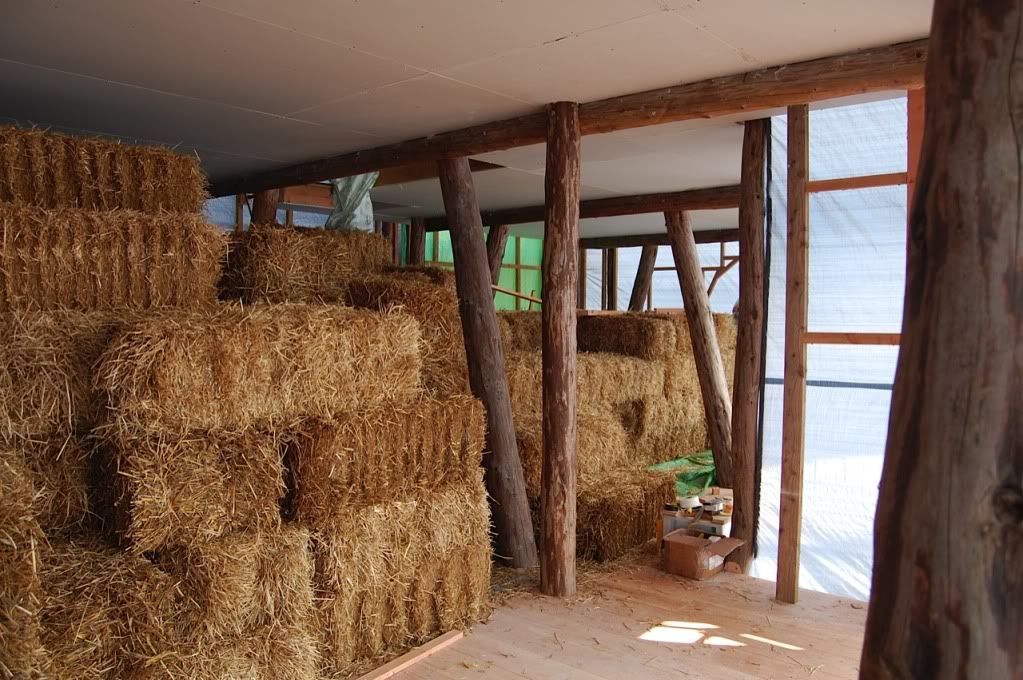
It's not quite a 'spot the difference'- more a look at how close it is!!
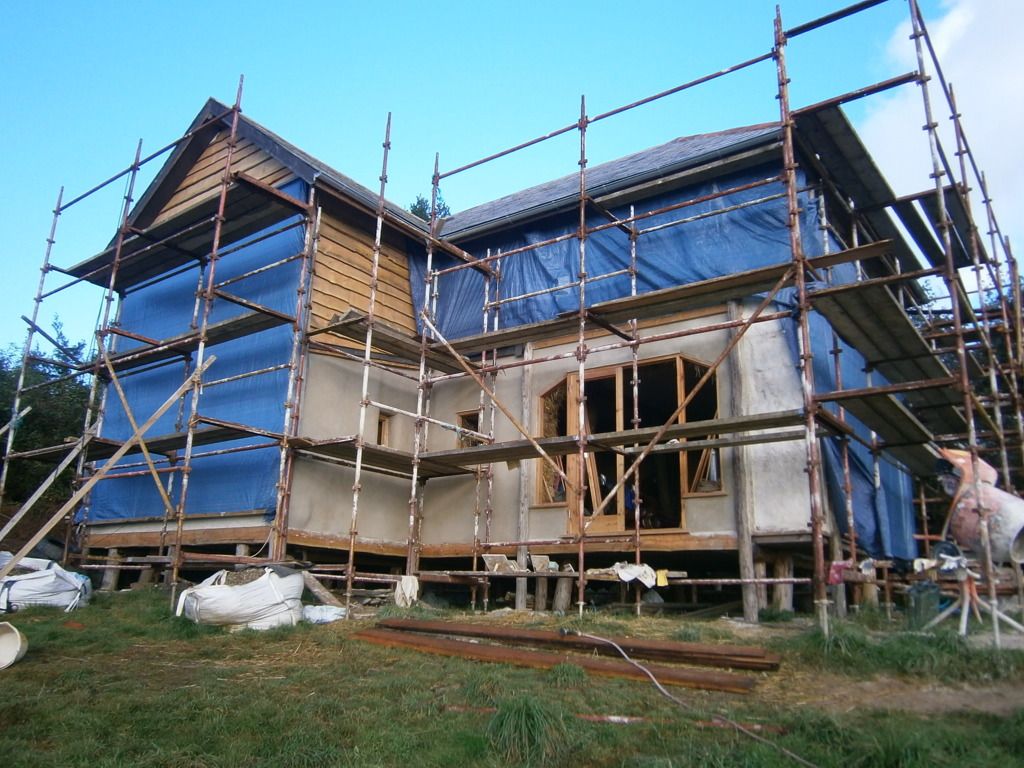
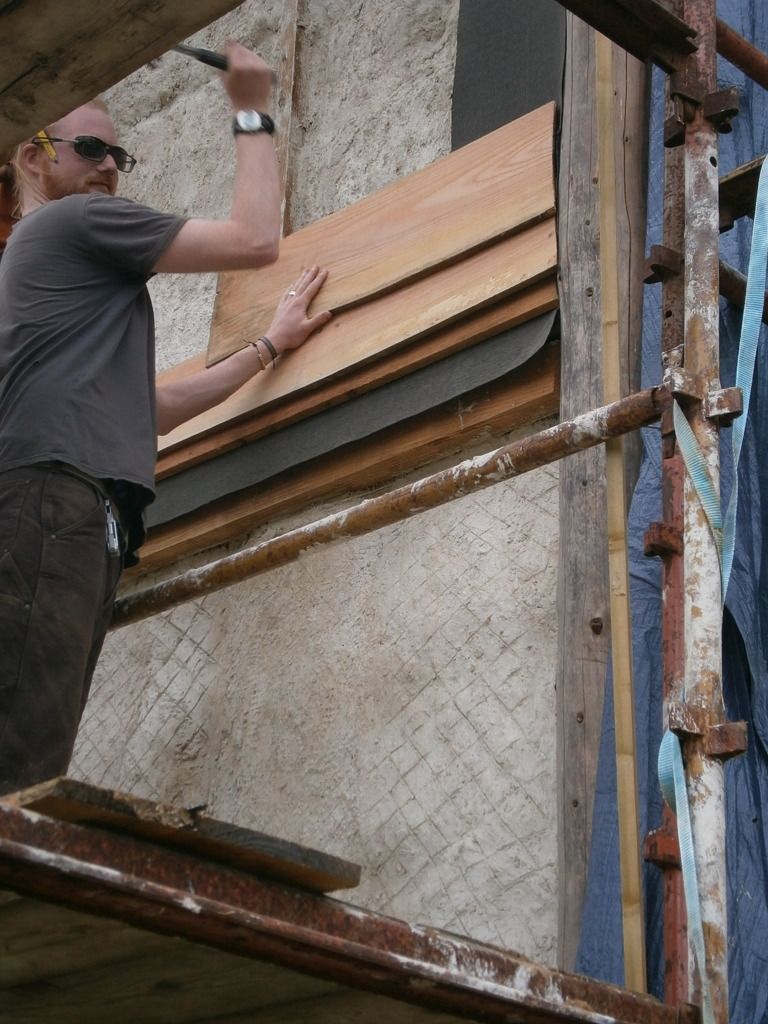
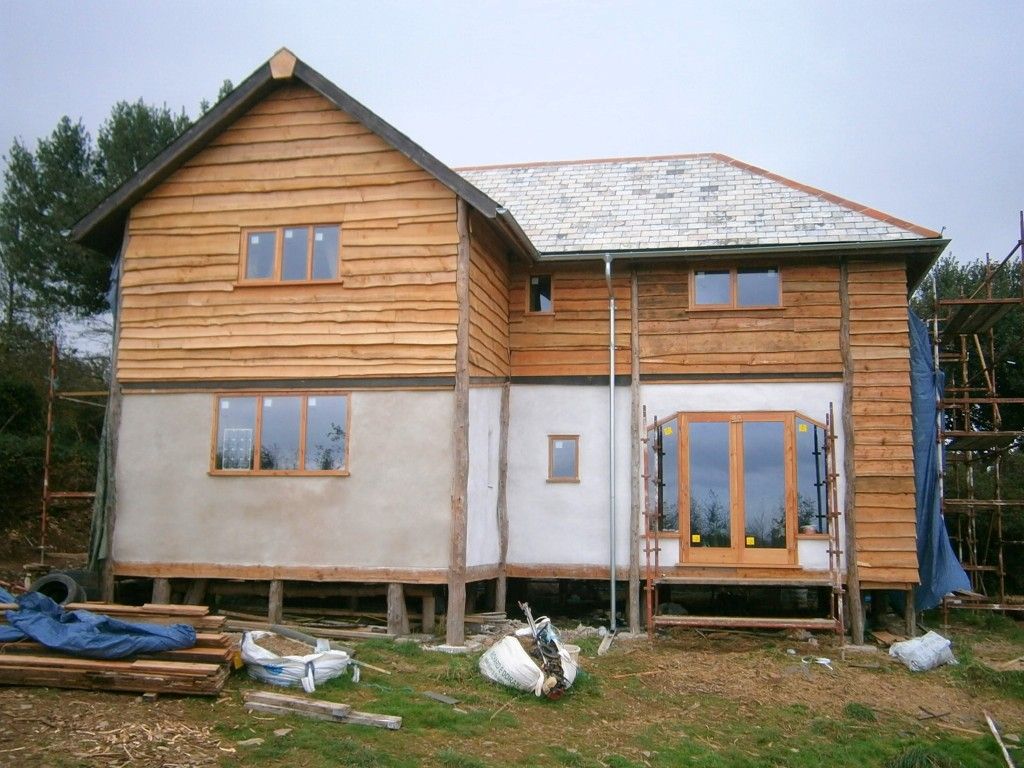
So... South elevation is open to the elements, glass, cladding lime... all done!
Hurrah!
...and hurrah again!
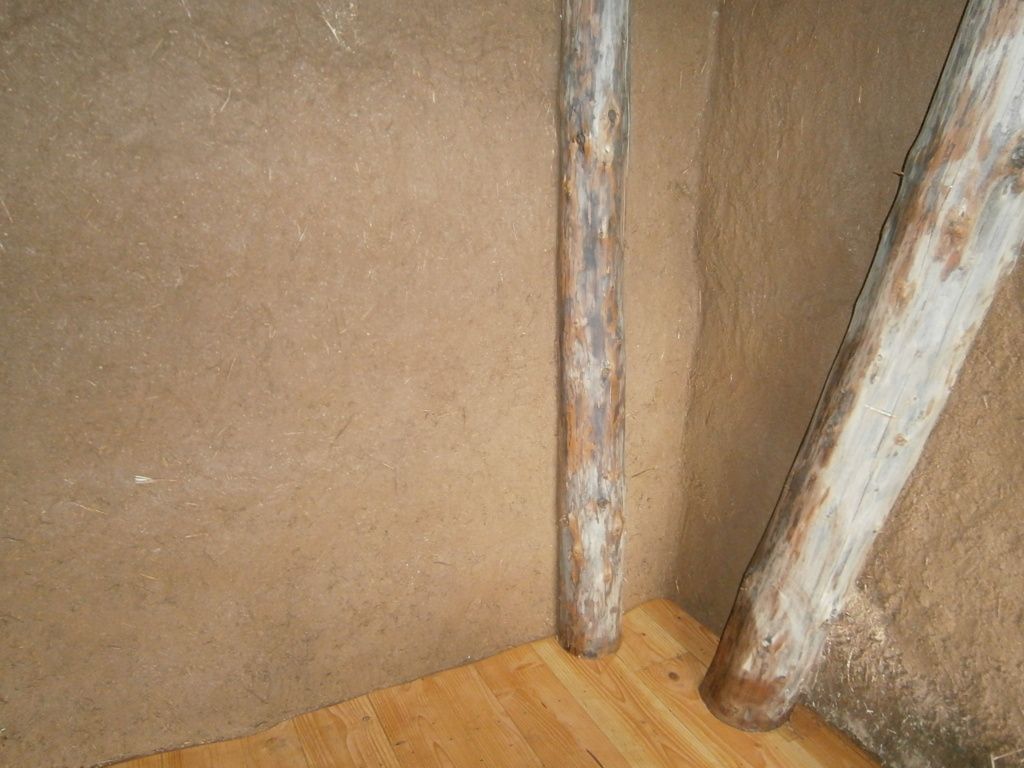
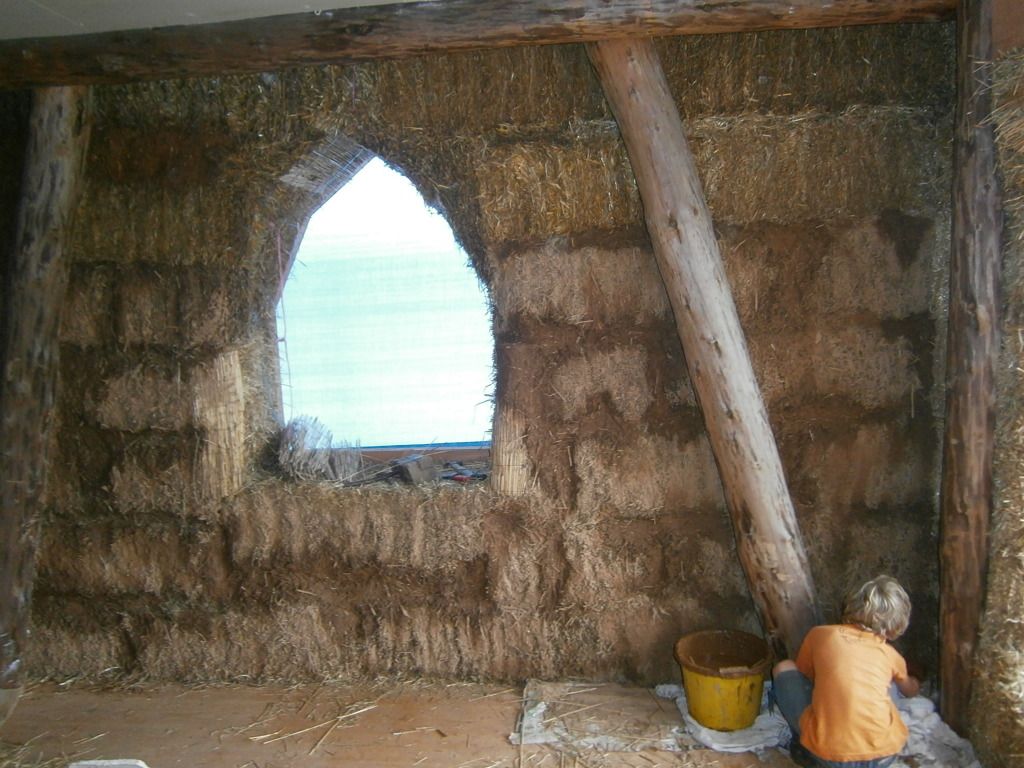
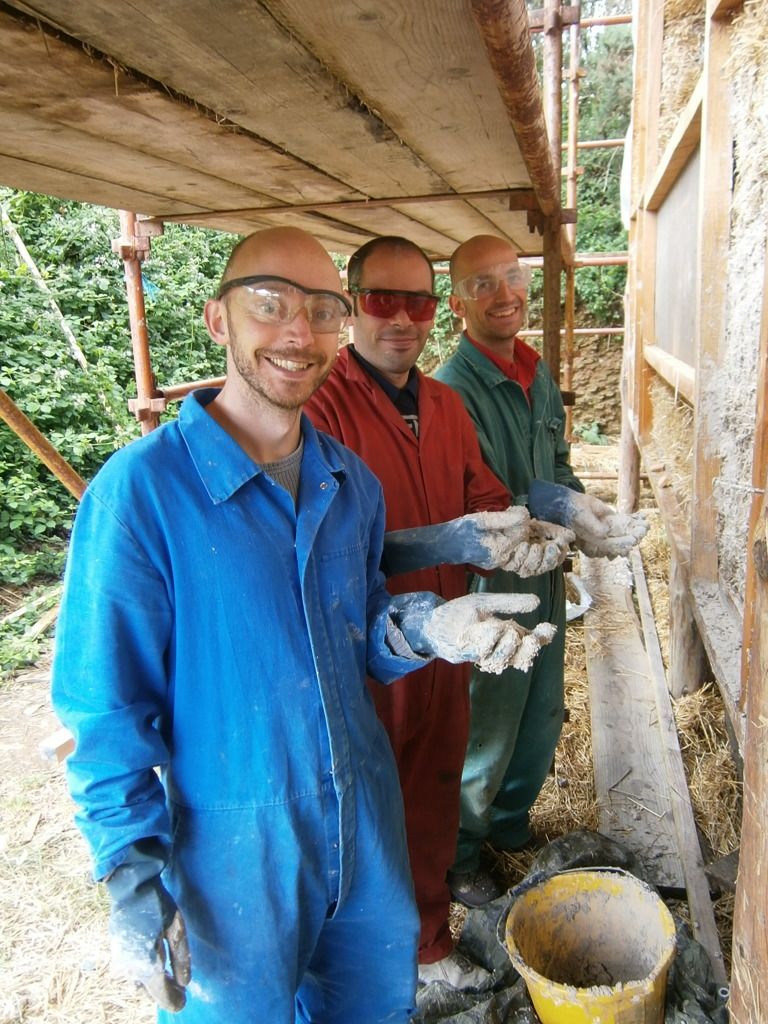
Ele and I have spent a few hours working on the house TOGETHER and applied some of the internal clay scratchcoat. All but two windows are in, and those should go in tomorrow, along with the main flue system and a temporary wood-burner to supply some ambient heating whilst the rest of the rendering, the wiring and plumbing take place over the winter.
Having said that, the house build is 'on hold' for a wee bit as we have several hundred metres of hedge to lay around the site here, which needs to be done by the end of the year to comply with the funding available for the process to happen. It will be nice to get back to hedge-laying- a task Ele and I used to do together professionally for the local council and the National Trust locally. It is even nicer to be doing it here, and also because it will be a nice change of focus for a while.
Ele has suggested that I post about things in the build process which have 'caught us out' as it may be helpful. I might try and tackle this in a separate post at a later date....
Thanks for reading.
Anthony
The story of a roundwood timber cruck frame straw bale house build in Pensilva, Cornwall. An earnest attempt at a building made for the 21st Century, including it's trials and tribulations!
Saturday, 27 October 2012
Sunday, 30 September 2012
Internal render - muddy fun!
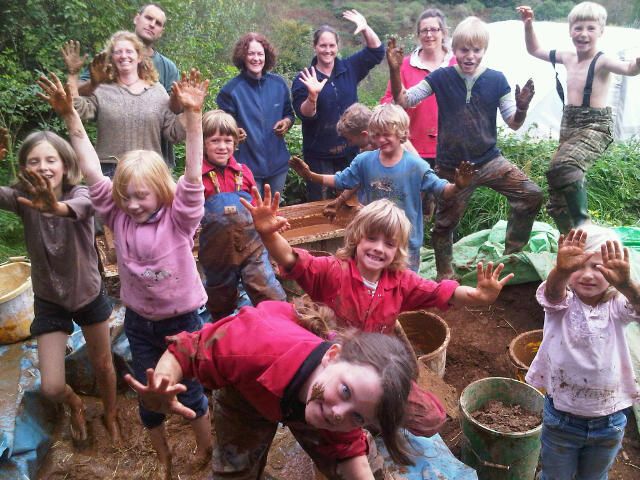
| Forest School children enjoying clay |
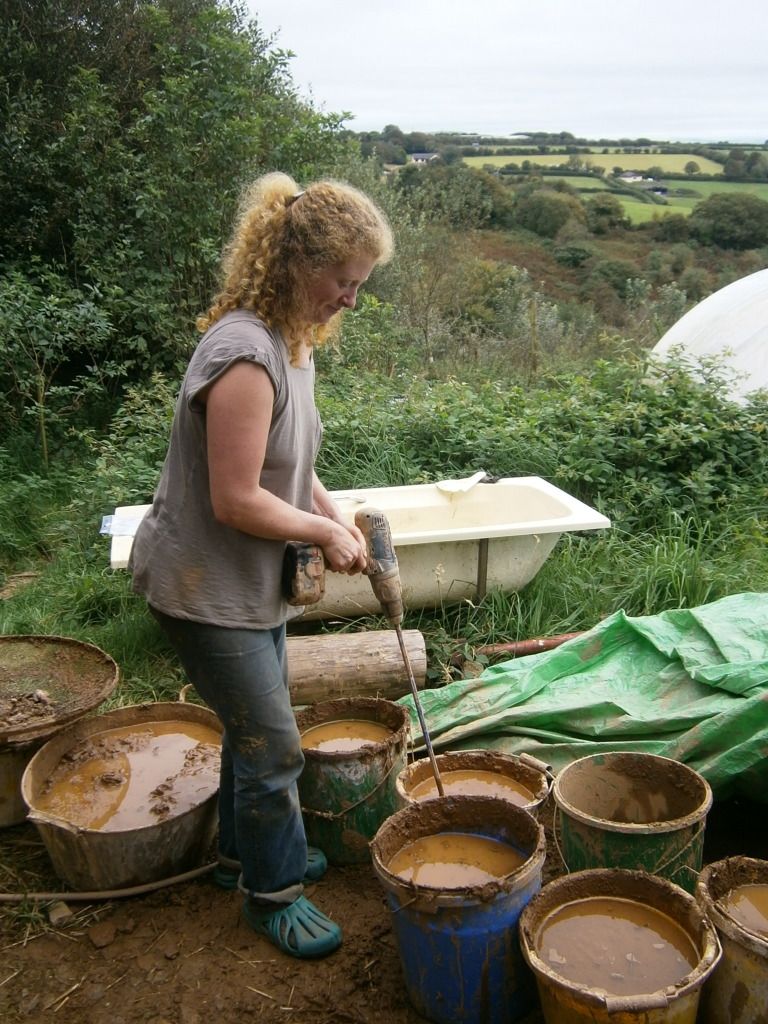
This is essentially just a clay soil, and depending which layer it is to be used for it may have sand and fibre mixed in too.
A purely clay soil slip is applied to the bales first, then a scratch coat of clay/sand and straw.
We wet sieved the clay, then puddled it (stomped around, danced, squished, etc.) in a pit and added loose cut straw as fibre.
Here are some pictures of the fun we had with the the forest school children......
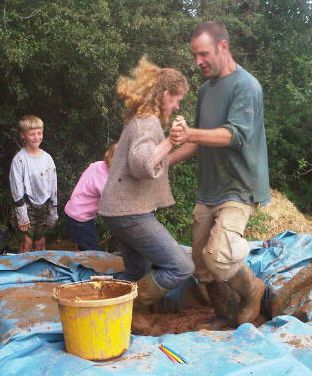
| Kerry Polka- Cornish Style |
Ele and I also did a wee bit'o the kerry set polkas in the 'puddling pit'. It's been rather a long time since we tried dancing this- and we were not wearing wellies!
| Internal Clay Scratch coat |
Several other exciting bits of progress have happened here too.
We took delivery of the glass on Thursday, so we can start filling the frames, and we have started the top-coat of lime on the exposed rendered areas of the house.
I have had a request for an updated 'whole house' picture.....
Thanks for the feedback we've had, and as always it's really nice to get peoples opinions and ideas- please feel free to post a comment.
Oh, and the wind generator managed the first 12hrs or so of high wind before stopping again- but I WILL FIX IT!
Until my next post,
Anthony
Thursday, 20 September 2012
Wind generator repair
Whilst this is not strictly 'house', I thought I would share this with you.
Our off-grid power system here is quite basic, and consists of two solar panels which total about 200W, and a wind generator which is a 400W machine.
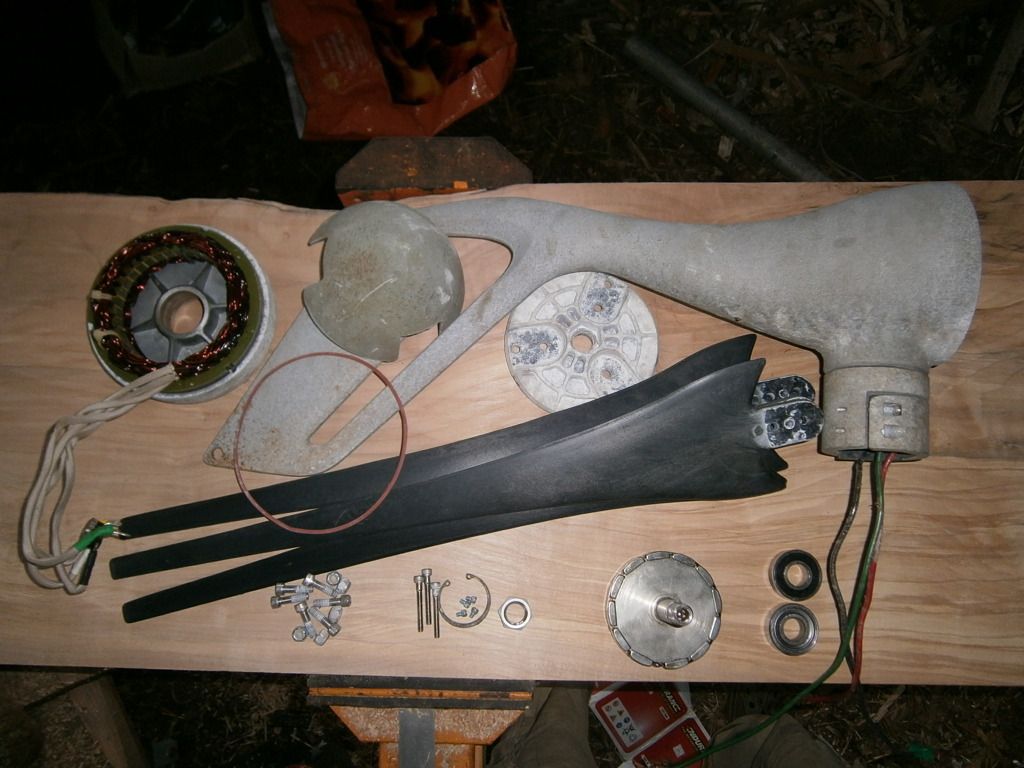
This Air403 Wind generator recently stopped turning, which with my extensive knowledge I conceived was a 'problem'.
We decided to lower it and take a look- a job we undertook without really thinking it through and subsequently the poles holding the turbine buckled part way through lowering it and further helped it's operational ability by smashing a blade off it. (oops! is what I said.....)
Ok!
So I removed the turbine from the poles, and placed it on my workbench. I then did a bit of research and contacted the company who made it, and the uk supplier asking about spares.
I know from replacing blades once before that a balanced set of 3 is about £70 minimum, but there was obviously more wrong with the machine.
I was told that the company no longer provided spares and I would need to purchase the newest model from them (about £800), so I decided that I had nothing to lose by dismantling the old unit.
I knocked them out of the housing- took down the numbers from the casings, and got back on to the internet.
I purchased the two bearings needed for less than a fiver and after having to order another one due to destroying one trying to re-insert it into the housing, I replaced them both and re-constructed the turbine.
I had one spare blade from the last set I replaced so I decided to risk an 'unbalanced' set to test the turbine.
On reading several bits of information on turbine blades I also filed off all the rough bits from the casting process and then polished them with t-cut. Apparently this reduces noise as they cut more cleanly through the air and causes less turbulence.
I purchased another couple of 6m steel scaffold poles (£20 each) and today we (carefully!) re-erected the turbine.
I am extremely pleased to report it is working absolutely fine!
For my part this was a really interesting experiment into what is possible with a little determination and a wish to 'prove them wrong' - for under £50 I have repaired the wind generator, and extended it's life from the 10 years it has already served us, to who knows how much more?
It also makes me realise that whilst many companies making 'sustainable' technologies are doing a fantastic job, they are also commercially motivated and the main motive is unfortunately profit. The embodied energy in a turbine like this is relatively speaking quite small, but if a unit can be repaired, or it's parts be re-used, surely we have a responsibility to our planets resources to do so?
Many of the parts, particularly the Permanent Magnets used on the rotor, use materials which are in limited supply and have a high embodied energy.
I will stop there though, before this turns into a huge rant, and a self-righteous blurb about sustainability and all it's many facets.
Thanks for reading, and if anyone would like to discuss this, or anything else about repairing stuff to keep it going (like old cordless battery packs, broken petrol motors, electronic gizmo's etc......) It's a little passion of mine, and I would love to hear your success stories and thoughts, and I'm also keen to share my experiences and knowledge. Comment or contact me! (if nothing to let me know I'm not alone!)
Regards to all,
Anthony
Wednesday, 5 September 2012
Lime, Clay and cladding
Hello once more, and again I apologise for a long delay since last I posted.
Much has been happening, not least I've had my 40th birthday and have had to deal with all the merriment, and the reflectiveness that has come with such an event. We had a fantastic party here the week before the day, with music, poetry and a little alcohol to help things along. Much fun was had and the site, and the house survived the whole affair- is it a sign of maturity that no-one threw-up, no glass was broken, and no-one was taken to hospital?
Anyway to the house progress.....
LIME
We have stopped on the lime for a while, due to weather and the number of hands available to help. We have however got a single coat on the whole of the outside, with most of it also having the second coat too.
It has been interesting trying to get definitive information about the lime, though I have to say our local company have been extremely helpful. In the end we opted for a 2:1 sand:lime mix throughout. A more liquid 'slip' as an initial coat, and a slightly thicker, drier second. After some experimentation we opted for smearing these on by hand (gloved of course!). Where we were covering timbers within the render we used a plastic mesh and overlapped in each dimension by approx 100mm. We also then added polypropylene fibre to the mix covering this. Between each coat we scored a crossing pattern to provide a key for subsequent coats.
WINDOWS
We have also now fitted most of the window frames and are imminently ordering the glazing to fill up the holes! Some of the windows have been manufactured (by FD Hall and Son, who have also done the machining of the floorboards) and some are being built direct into the stud frames, this saves on workshop fees and and non-opening windows units can be fitted quite easily.
CLAY
CLADDING
The other slightly awkward bit here is that we have a lean to roof coming forward of the house at the point where the cladding starts- well actually we don't and herein is the problem- we have needed to provide for this and work out how to flash the join to prevent water running down the inside edge. Ah, 'tis all fun 'n' games you!
Anyway Dave is back for a while but is starting a job at Trevalon next week, and Hannah and George are back for more 'fun' (nutters!).
As always thanks for reading, and please feel free to comment.
Until next time,
Anthony
Saturday, 7 July 2012
Baling process is now finished- we have walls!
Firstly, sorry for the long delay in posting and for the 'down' tone of the last post.
We have some brighter news- the baling is now complete and we finally have walls!
To be honest, the weather has been really pants, and when one is trying to protect bales with flimsy tarpaulins, high winds and heavy rain are not good.
Bale wall removal
When the initial shock, dismay, desperation and misery had subsided into acceptance and determination, we attempted to ascertain the extent of the damage.
The upshot of the tests with the moisture meter and makeshift probe showed that most of the bales we identified as being wet, dried sufficiently over time to not become a problem, with just one exception. This exception was of course a bale right at the bottom of one of the walls near our back door.
Earlier this week we finally 'bit the bullet' and dismantled the wall and replaced the offending bale, rebuilt the wall and completed the rest of the baling. The dismantling and rebuilding took less than a day.
When I cut the strings on the offending bale to look inside it showed no damage, no rot or any sign of a problem! So whilst in a way it was a pointless process, it has served to reassure us that all the other bales that got wet will also be fine. So really the only impact on us has been time, a little effort oh, and a fair bit of stress!
Plasterboarding
The other process we completed this week has been the plaster-boarding of the upstairs ceiling. It seemed like a good place to end the week. The question was asked by one of the volunteers about the choice of ceiling boards. I had to answer honestly on this one and explain that we needed something quickly and therefore did not have time to research further on alternatives that may have been more sustainable/green. Subsequently we have found the information we needed which shows that we have not made a particularly good choice but definitely cheaper which is unfortunately starting to become a more major consideration.
Reed matting and lime
We've started the Lime process too. First of all though we had to pin reed matting around window and door openings to provide a more robust and stable substrate for the lime (and for the clay on the internal walls). It helps with forming shapes too and I have to say the main entranceway is looking great!
We're fumbling around a bit with the lime due to the course not running and therefore no 'expert' on hand. We have a friend coming next week who is an expert so he'll make sure we're doing it all right!
So, whilst we are now well behind schedule and the general levels of stress have increased, we feel like things are starting to flow again, and with the lime process happening hopefully we won't have any further issues with the wet weather.
I will endeavour to post again in the not too distant future.
Until then please feel free to comment on the blog, offer us support/ kind words etc.- It's always appreciated!
Regards,
Anthony
We have some brighter news- the baling is now complete and we finally have walls!
To be honest, the weather has been really pants, and when one is trying to protect bales with flimsy tarpaulins, high winds and heavy rain are not good.
Bale wall removal
When the initial shock, dismay, desperation and misery had subsided into acceptance and determination, we attempted to ascertain the extent of the damage.
The upshot of the tests with the moisture meter and makeshift probe showed that most of the bales we identified as being wet, dried sufficiently over time to not become a problem, with just one exception. This exception was of course a bale right at the bottom of one of the walls near our back door.
Earlier this week we finally 'bit the bullet' and dismantled the wall and replaced the offending bale, rebuilt the wall and completed the rest of the baling. The dismantling and rebuilding took less than a day.
When I cut the strings on the offending bale to look inside it showed no damage, no rot or any sign of a problem! So whilst in a way it was a pointless process, it has served to reassure us that all the other bales that got wet will also be fine. So really the only impact on us has been time, a little effort oh, and a fair bit of stress!
The other process we completed this week has been the plaster-boarding of the upstairs ceiling. It seemed like a good place to end the week. The question was asked by one of the volunteers about the choice of ceiling boards. I had to answer honestly on this one and explain that we needed something quickly and therefore did not have time to research further on alternatives that may have been more sustainable/green. Subsequently we have found the information we needed which shows that we have not made a particularly good choice but definitely cheaper which is unfortunately starting to become a more major consideration.
Reed matting and lime
We've started the Lime process too. First of all though we had to pin reed matting around window and door openings to provide a more robust and stable substrate for the lime (and for the clay on the internal walls). It helps with forming shapes too and I have to say the main entranceway is looking great!
We're fumbling around a bit with the lime due to the course not running and therefore no 'expert' on hand. We have a friend coming next week who is an expert so he'll make sure we're doing it all right!
So, whilst we are now well behind schedule and the general levels of stress have increased, we feel like things are starting to flow again, and with the lime process happening hopefully we won't have any further issues with the wet weather.
I will endeavour to post again in the not too distant future.
Until then please feel free to comment on the blog, offer us support/ kind words etc.- It's always appreciated!
Regards,
Anthony
Friday, 4 May 2012
Bales and horrible weather!
Now I'm normally one for being bright and optimistic, and I more often than not see the silver lining in each cloud that comes our way.
However we've had rather a few too many clouds come our way and they've dumped large volumes of water on us and have been driven by strong winds. It has unfortunately had an impact, not only on our lovely bale walls but on morale as a whole.
It is difficult to assess the damage accurately at this time, mainly because there is very little information out there to tell us what constitutes a problem and what doesn't. It appears from what little I can find in books and on the web that surface moisture on the bales can be expected to dry out, but there comes a point where the bale starts to rot before they can dry. This is the vagary I'm battling with.
The repercussions of the damage range therefore from 'let them dry out and all will be fine' to 'we need to remove some large sections of the walls and replace them with dry bales'. The risk of hoping they will dry of course is that they may not do so, and will start to rot inside the walls
Testing Moisture Content
So I've tried to help myself a little here and I have borrowed a moisture meter from Tino, and built a basic probe to extend the reading point into the bale. By doing this and checking a known dry bale, and a known wet one we have a relative indication of the ingress depth, and monitoring for a few days will tell us if the bales are drying at all.
I am also taking heart from a story of a self-builder in Brittany who, after building two bungalows on the cliffs (i.e extremely exposed) his Lime render which had not yet fully carbonised, allowed storm driven rain into the bale walls to the extent that damp was showing on the internal plaster, and they started to smell of rot He took a risk and clad the outer of the wall and after 4 months his bale walls had dried to a satisfactory level, the smell of rot had gone, and his walls were subsequently fit for their purpose.
Given that we intend to clad anyway, and ours do not smell of rot.....!
Slow Week
This week has been slow due to the decision to halt baling for a while to assess things, but also we seem to have had a bout of sickness and many of us have spent at least one day in bed. It's probably no bad thing, as I'm sure it will help us recover from the stresses and the strains!
Next week will be a better week!
Here is a photo of the house with the sun shining!
However we've had rather a few too many clouds come our way and they've dumped large volumes of water on us and have been driven by strong winds. It has unfortunately had an impact, not only on our lovely bale walls but on morale as a whole.
It is difficult to assess the damage accurately at this time, mainly because there is very little information out there to tell us what constitutes a problem and what doesn't. It appears from what little I can find in books and on the web that surface moisture on the bales can be expected to dry out, but there comes a point where the bale starts to rot before they can dry. This is the vagary I'm battling with.
The repercussions of the damage range therefore from 'let them dry out and all will be fine' to 'we need to remove some large sections of the walls and replace them with dry bales'. The risk of hoping they will dry of course is that they may not do so, and will start to rot inside the walls
Testing Moisture Content
So I've tried to help myself a little here and I have borrowed a moisture meter from Tino, and built a basic probe to extend the reading point into the bale. By doing this and checking a known dry bale, and a known wet one we have a relative indication of the ingress depth, and monitoring for a few days will tell us if the bales are drying at all.
I am also taking heart from a story of a self-builder in Brittany who, after building two bungalows on the cliffs (i.e extremely exposed) his Lime render which had not yet fully carbonised, allowed storm driven rain into the bale walls to the extent that damp was showing on the internal plaster, and they started to smell of rot He took a risk and clad the outer of the wall and after 4 months his bale walls had dried to a satisfactory level, the smell of rot had gone, and his walls were subsequently fit for their purpose.
Given that we intend to clad anyway, and ours do not smell of rot.....!
Slow Week
This week has been slow due to the decision to halt baling for a while to assess things, but also we seem to have had a bout of sickness and many of us have spent at least one day in bed. It's probably no bad thing, as I'm sure it will help us recover from the stresses and the strains!
Next week will be a better week!
Here is a photo of the house with the sun shining!
Wednesday, 11 April 2012
Bale walls at last!
Hello all,
BALING HAS BEGUN!
This in some respects seems to be the biggest step as we fill in the walls and create a fully enclosed space, the culmination of all our efforts thus far.

Baling is not overly complex, and in that respect is a joy!
The walls are building surprisingly quickly, and we reckon we will be done in just 3-4 weeks.
Becky, with her experience of several bale builds in Germany, has shown us the process, and is our in-house (!) expert.
This coming week is set to be a very busy one, with 8 people staying here and many more 'dropping in'. We're hoping for sunshine, otherwise feeding everyone in the mobile home could get a little cosy!!
More pictures will follow as and when we get them.
till the next post....regards,
Anthony
BALING HAS BEGUN!
This in some respects seems to be the biggest step as we fill in the walls and create a fully enclosed space, the culmination of all our efforts thus far.
Baling is not overly complex, and in that respect is a joy!
The walls are building surprisingly quickly, and we reckon we will be done in just 3-4 weeks.
Becky, with her experience of several bale builds in Germany, has shown us the process, and is our in-house (!) expert.
This coming week is set to be a very busy one, with 8 people staying here and many more 'dropping in'. We're hoping for sunshine, otherwise feeding everyone in the mobile home could get a little cosy!!
More pictures will follow as and when we get them.
till the next post....regards,
Anthony
Subscribe to:
Posts (Atom)