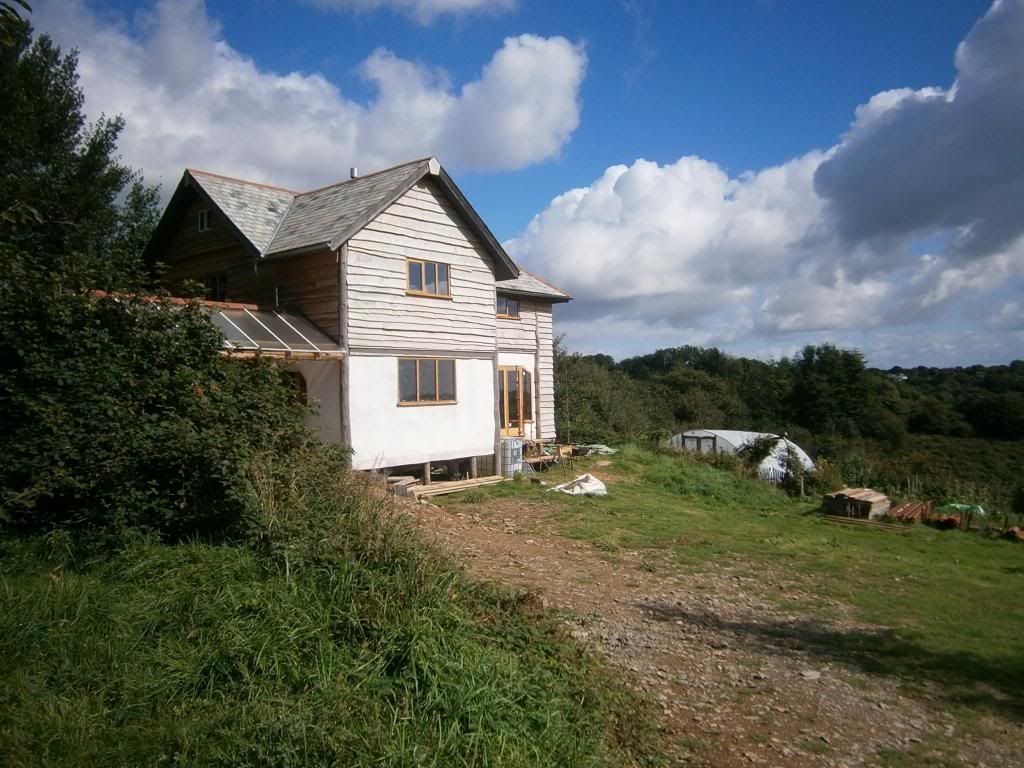
Lots of stuff to mention on this post. A lot of relevant information to share. There have been a few things through the build process that have been 'awkward' and have pushed our time-scales, as well as our patience. The ones that are most significant are the roof structure, the round-wood support beams, the baling and lime/clay/cladding process and specifically the window headers.
I'll talk a little about these in the order we had to tackle them...
Roof structure
I may have mentioned this as we were framing the roof. The implication of the hip and valleys, the framing, the battening, the slating and the ridge tiles all took far longer with the decision to have this more complex roof shape.
Not that I would change the design mind you, but an appreciation of the impact would have been useful prior to the build.
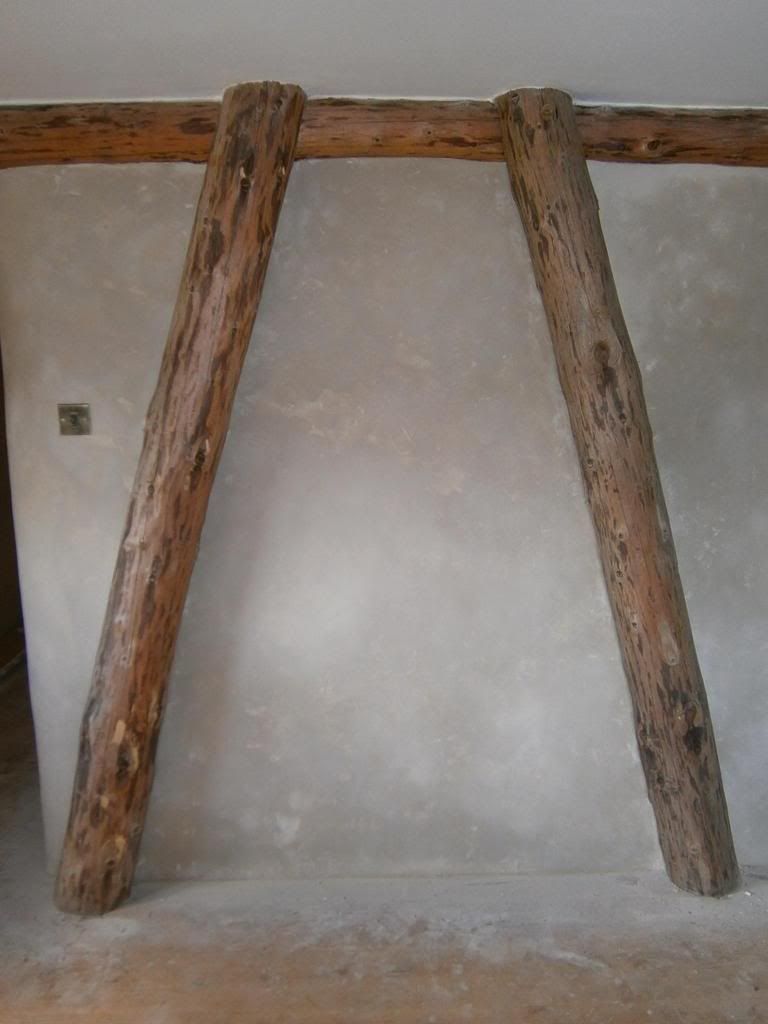
Roundwood support beams
These are lovely where they are visible and worth the extra work, but in hindsight I would have used sawn support beams under the ground floor, so each joist would not have had to be individually 'cut in' to the roundwood support.
The baling
"building a bale wall is quick because they're just really big bricks!"
WRONG! By the time all the bales are sewn to size, packed, compressed as a wall unit it is NOT quick. I'm sure there are ways to speed the process up, but unless you can be incredibly sure of your bales and how they fit, it's always a bit of a game sewing them to size. The final layer of bales (the compression layer) was really difficult and on occasion the air was blue as we fought to get one in place.....!
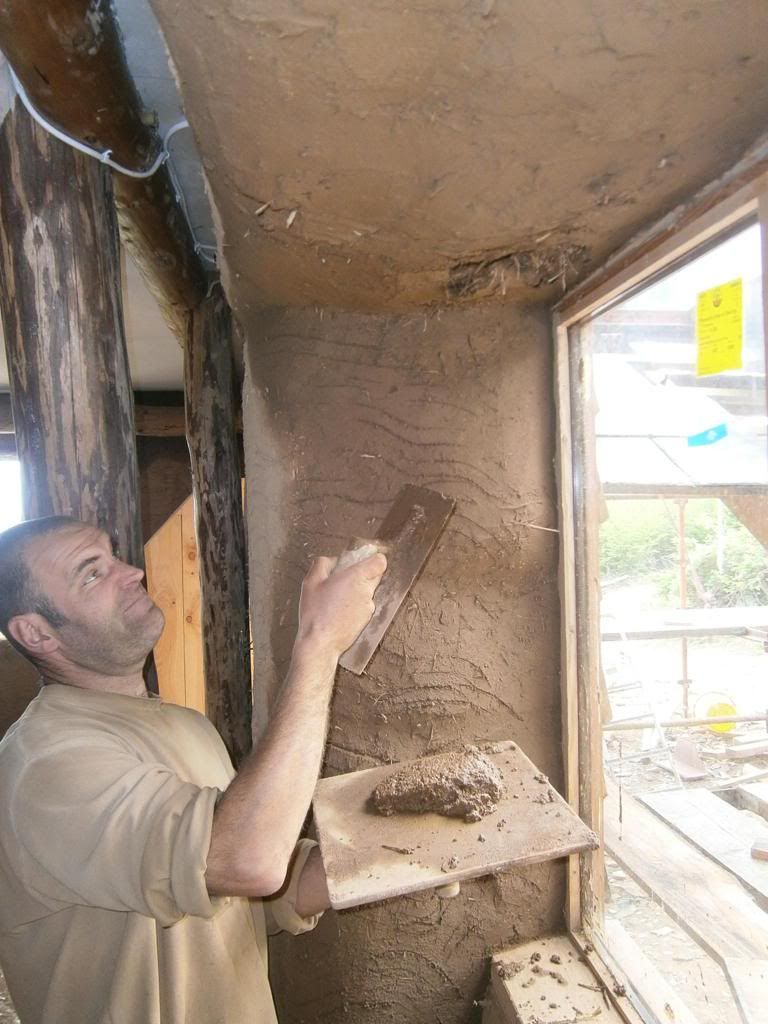
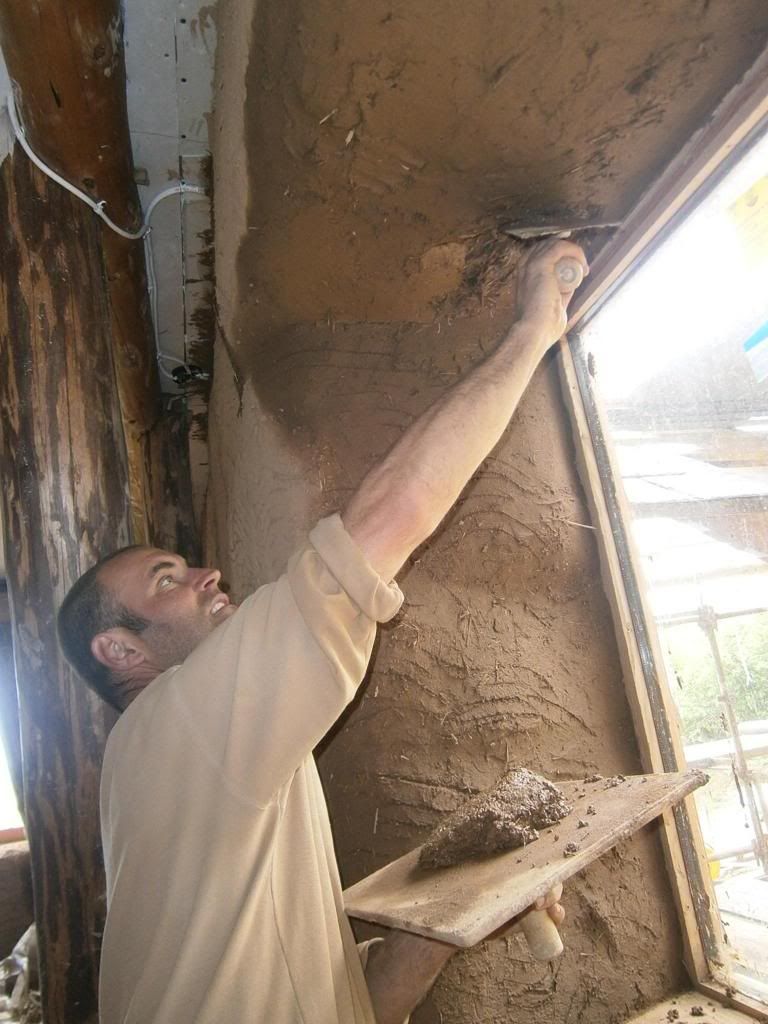
The clay, lime and cladding
Again, the impression we had was that this would be a quick 'slap it on' type process. The reality is it takes a long time, especially with a large wall area, and little experience. We have definitely got quicker at all these processes, but it's no 5 minute job.
It is however a very satisfying one. When you get proficient with the materials you are using the job does become quite pleasurable too. But it is worth noting for any would be self-builders out there that it has taken immeasurably longer to complete these elements of the build than we ever imagined....
Window headers
These have been a right pain in the 'bum'! Part of the problem here was a failure to really plan out and standardise the window openings and the support for the bales above. I am still trying to work out the best plan for this for myself, though I'm sure others have already been through this process already.
Suffice to say I have had a few very frustrating moments when having thought I had just completed a header the part I started with 'flumped' down on to the sill below. (Note the new coinage of the word 'flump'- from the sound clay makes when it falls off a non-adhering surface; to flump; it flumped; flumpage....)
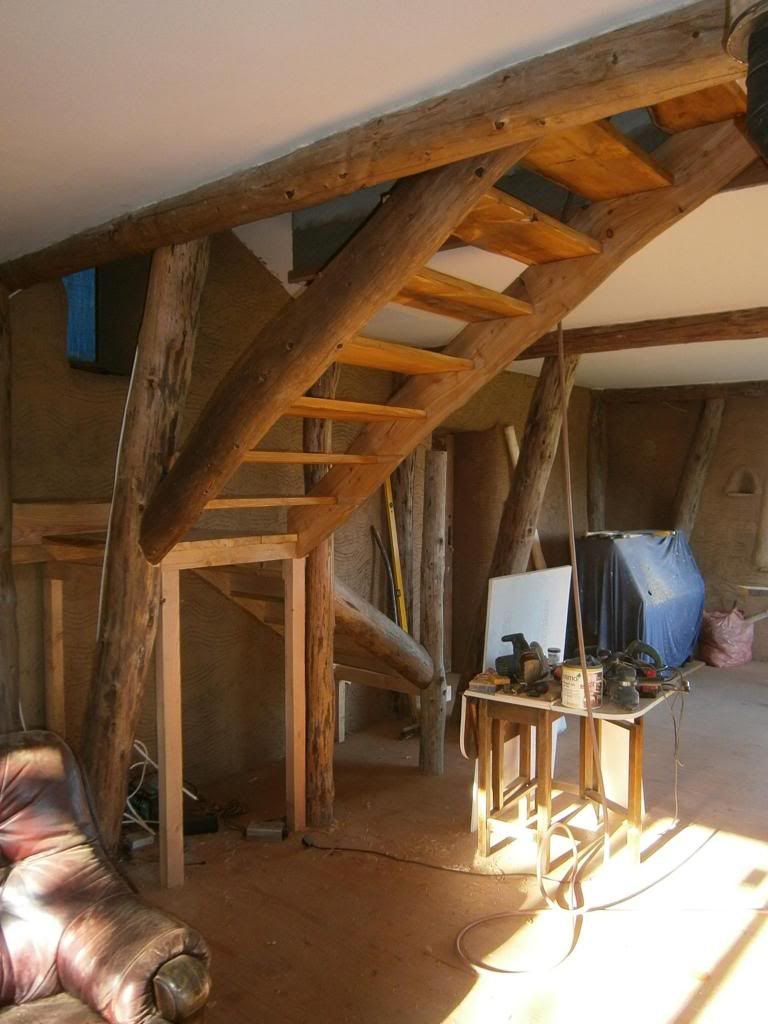
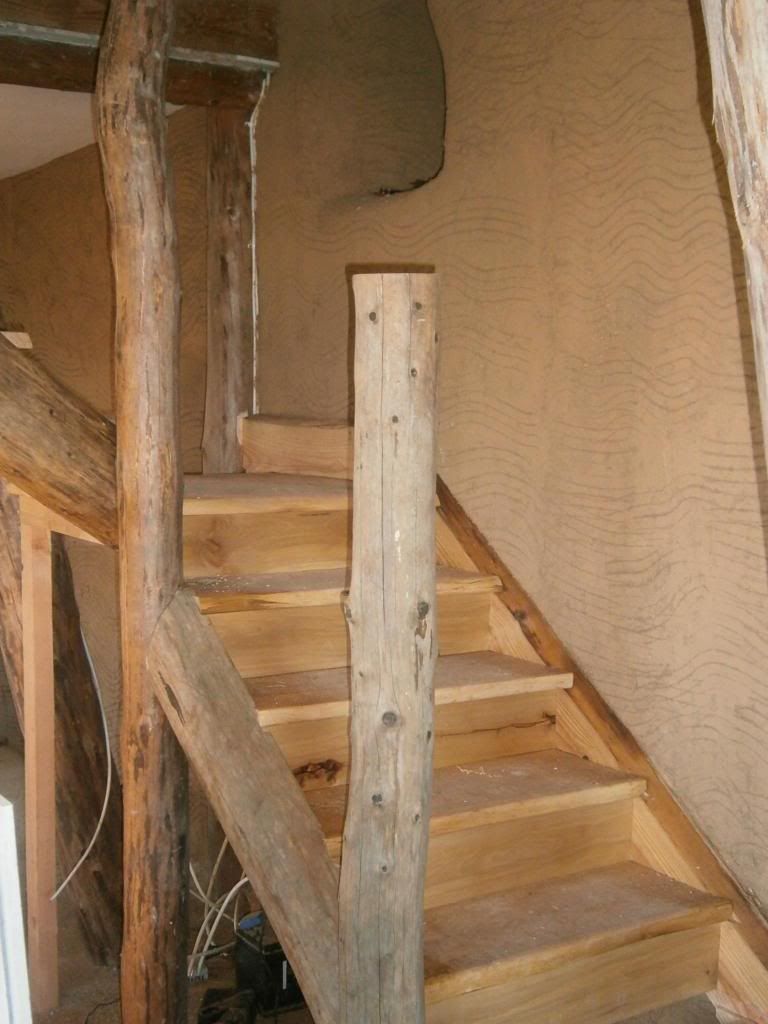
Rustic staircase
I've had great fun with this- back to familiar ol' wood!
It's not been all that straightforward, but it's nice to be working with a familiar material and not having to refer back to books or the internet for 'how to's' all the time.
The regulations however are quite specific and have been referred to since the design stages.
There is a minimum 'going' (tread depth from nose to nose) of 220mm, a maximum rising (top of tread to top of tread) of 220mm, a maximum pitch of 42°, and the equation of 2r+g has to be between 550-700. This plus a 16mm 'nosing' (the overlap from front of tread to back of lower tread) and minimum head clearance of 2m from pitch line (front of noses). There is also a requirement that no gap is greater than 100mm, so open backs on treads need to be filled so they are 99mm or less.
My stairs have a tread depth of 250mm, a rising of 175mm (which using that old maths stuff works out at tan-1(175/250)=34.99°), and my 2r+g=600.
We've also just begun top coat lime on the internal stud walls and have ordered the clay topcoat from Clayworks. I'll get some 'photo's up soon on these... keep checking this post as I'm gradually 'filling it out' and updating it.
Regards to you all
Anthony
Hi there, Anthony! Building a house takes a lot of time and effort, not to mention budget. But despite these difficulties you are telling us, we can all see that you're doing well with this. All of you. But yeah, all of these details needed to be attended to in order to ensure that the house is going to be sturdy and truly pays off everything you invested on it. Keep up the good work!
ReplyDeleteJesse @ Jon Wright Industries